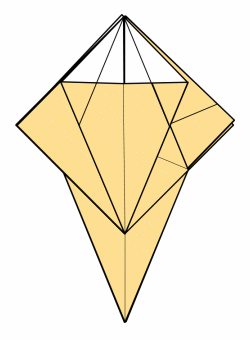
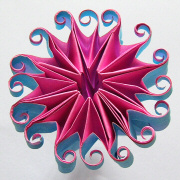
- How to make “Marguerite” / マーガレットの作り方
- Work data
- Preparations / 用意するもの
- How to fold / 折り方
- Page 1 : processes 1 – 20
- Page 2 : processes 11 – 20
- Page 3 : processes 21 – 30
- Page 4 : processes 30 – 40
- Page 5 : processes 41 – 50
- Page 6 : processes 51 – 60
- Page 7 : processes 61 – 70
- Page 8 : processes 71 – 80
- Page 9 : processes 81 – 90
- Page 10 : processes 91 – 100
- Page 11 : processes 101 – 110
- Page 12 : processes 111 – 120
- Page 13 : processes 121 – 124
- Marguerite Type B / マーガレット タイプB
- How to get parts together / パーツのまとめ方
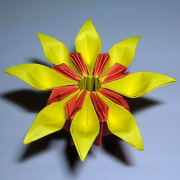
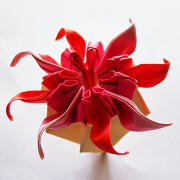
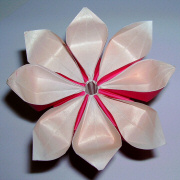
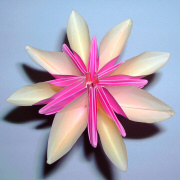
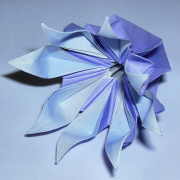
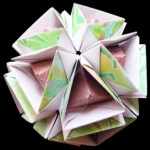
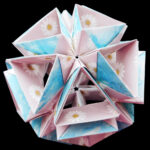
- Variations gallery / バリエーションギャラリー
- Development works / 発展作品
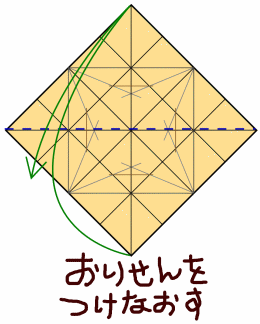
How to make “Marguerite” / マーガレットの作り方
Work data
- Author
- Mio Tsugawa
- Creation date
- Oct.2007
- Drawing
- Feb.2010
- Parts
- 30 – 32
- Paper size
- 15 cm (Square paper)
- Assembling Type
- Bing-Type
- Joining materials
- Threads and Strings
Memo
Not to mention an kusudama, even one only part is pretty.
Each image is drawn bigger as possible. If you are hard to see it, please regulate it by the indication of your browser.
It is shown pictures which are after the folding and before the folding. If you will not understand way to fold, please compare these pictures carefully.
This diagram has a long process a bit, please take a break halfway. I don’t want you will have a nervous breakdown…

見やすいように図面は出来る限り大きめに描きました。逆に見にくい人は、ブラウザで表示を調節してね。
工程の絵は折る前と折った後がかならず描いてあります。分からなくなったら、じっくり見比べてみてね。
工程が少し長めなので、途中で適当に休憩を入れてください。頭がウニになります。
図面はすべて手描きなため、立体的な絵は前後の大きさがびみょーに違うかも。でも、ま、気にせず進んでください。
Preparations / 用意するもの
origami paper / 折り紙 : 30 – 32 sheets
15cmの折り紙の場合、完成品はだいたい直径12cmくらいになります。両面折り紙だと華やかになるよ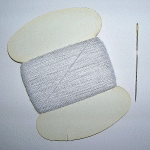
Threads and a needle / 針と糸
パーツをまとめる時に使います
Clips(Optional) / 目印になるもの
全体をまとめる糸にクリップなどをつけると、わかりやすいよ。目印にするだけなのでなくてもO.K!-

Tassel (lily yarns) / リリヤーン (It’s optional.お好みで)
飾るための房。なくてもO.K!(この見本では使ってません) -
other tools: Scissors,Tweezers, Bamboo stick (to curl petals), Sprit
道具 ; はさみ、ピンセット、竹串など
How to fold / 折り方
Page 1 : processes 1 – 20
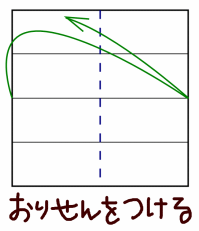
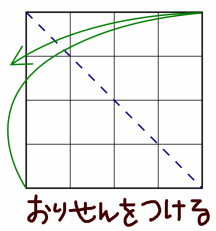
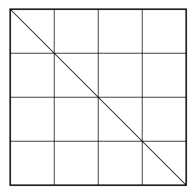
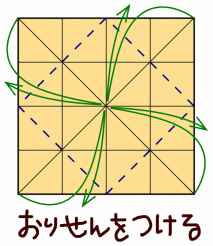
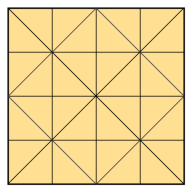
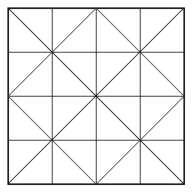
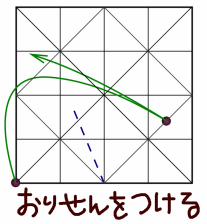
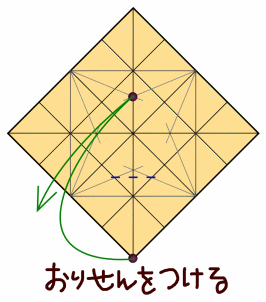
- 1
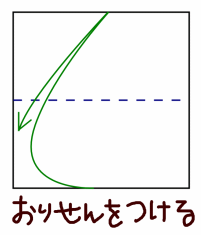
Fold and unfold
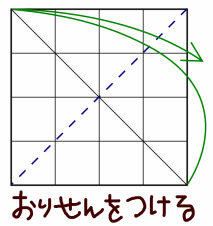
- 2
- 3
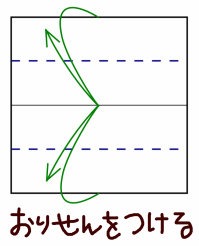
Fold and unfold
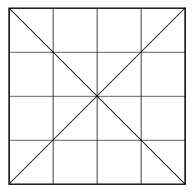
- 4

- 5
Fold and unfold
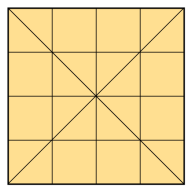
- 6

- 7
Fold and unfold
- 8
- 9
Fold and unfold
- 10
Page 2 : processes 11 – 20
- 11
Fold and unfold
- 12
-

Turn it over
- 13
- 14
Fold and unfold
- 15
-
Turn it over
- 16
- 17
Fold and unfold
- 18
- 19
Fold and unfold
- 20
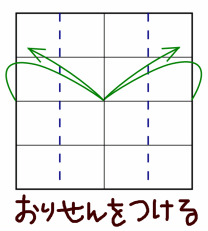
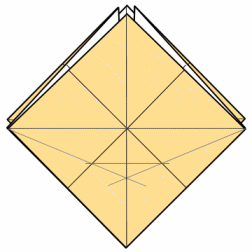
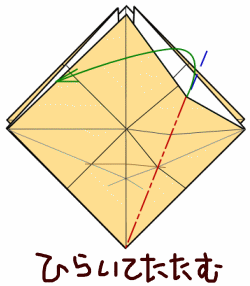
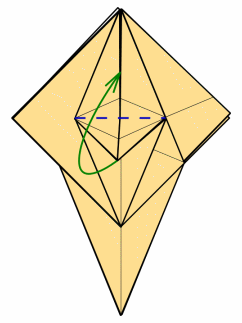
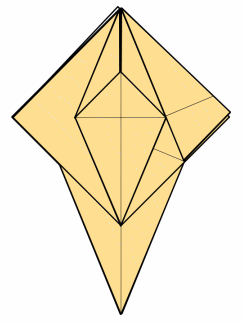
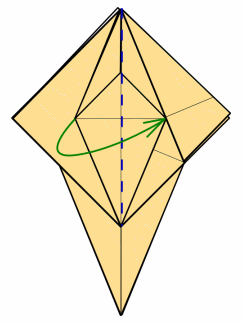
Page 3 : processes 21 – 30
- 21
Turn it 90 degrees.
- 22
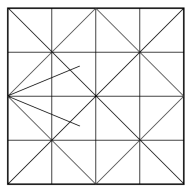
- 23
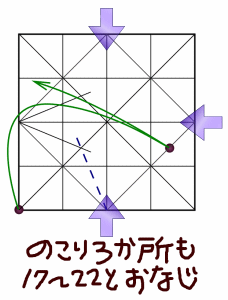
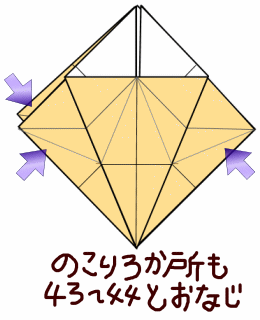
The other three places are folded in the same way as processes 17 – 22, too.
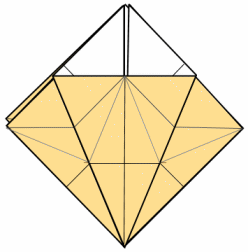
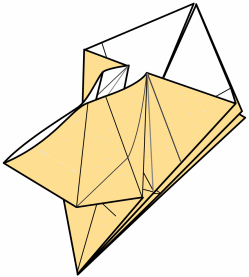
- 24
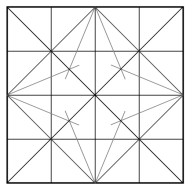
-
Turn it over
- 25
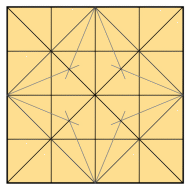
- 26

Turn it 45 degrees
- 27
- 28
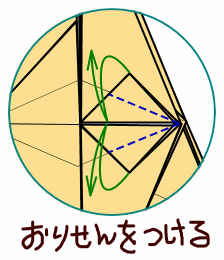
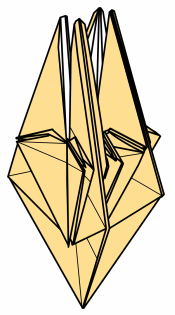
Fold and unfold
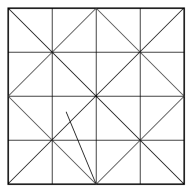
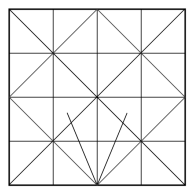
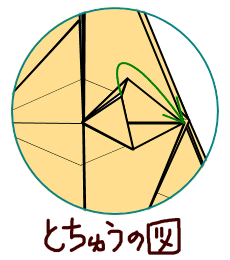
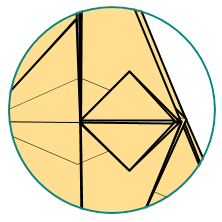
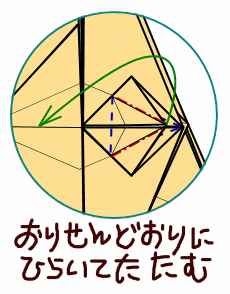
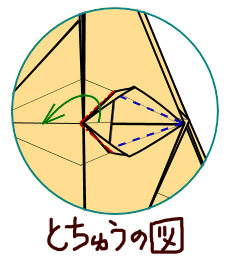
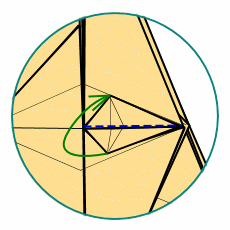
- 29
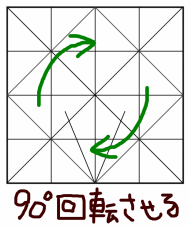
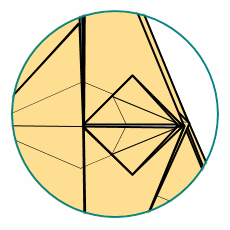
- 30

Turn it 90 degrees
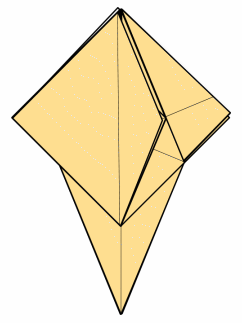
Page 4 : processes 30 – 40
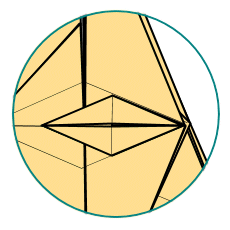
- 31
- 32

The other three places are folded in the same way as processes 28 – 31, too.
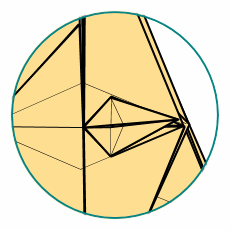
- 33
- 34
Fold and unfold, again.
- 35

Fold and unfold, again.
- 36
-
Turn it over
- 37
-

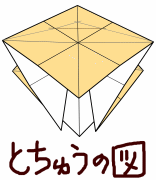
Picture is enlarged
- 38
Fold it as along lines folded.
- 39
In process
- 40
In process
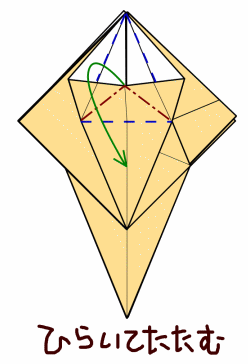
Page 5 : processes 41 – 50
- 41
-
Picture is turned upside down (Turn it 180 degrees.)
-
Picture is enlarged
- 42
- 43
Open and fold
- 44
- 45
The other three places are folded in the same way as processes 43 – 44, too.
- 46
- 47
Turn a part of face and a part of backside.
- 48
- 49
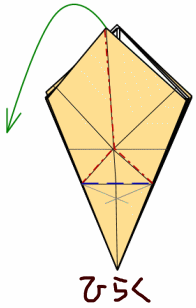
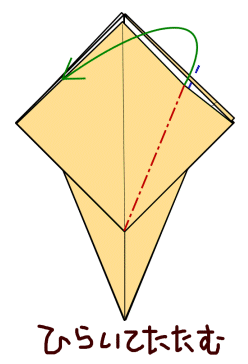
Open
-
Picture is enlarged
- 50
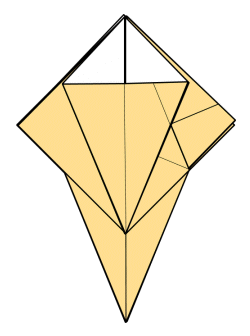
In process
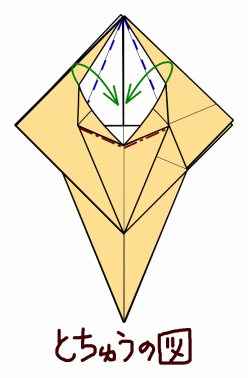
Page 6 : processes 51 – 60
- 51
- 52
Colse it.
- 53
- 54
Squash it as following the folded lines.
- 55
In process.
- 56
- 57
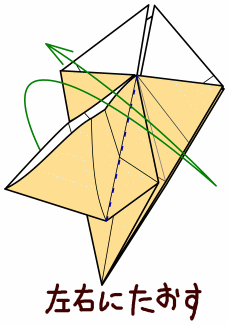
Fold it to left and right
- 58
- 59
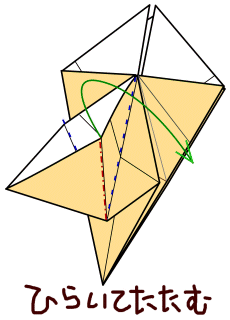
Open and squash.
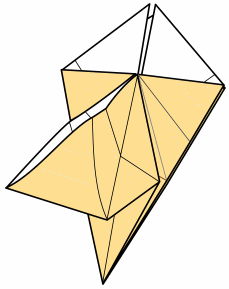
- 60
In process.
Page 7 : processes 61 – 70
- 61
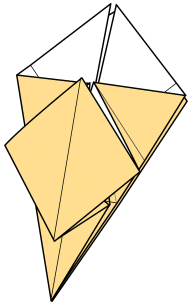
- 62
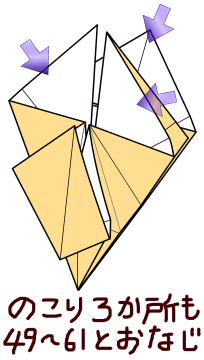
The other three places are folded in the same way as process 49 – 61, too.
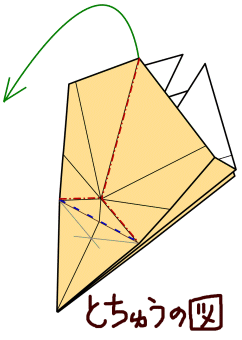
- 63

-
Picture is enlarged
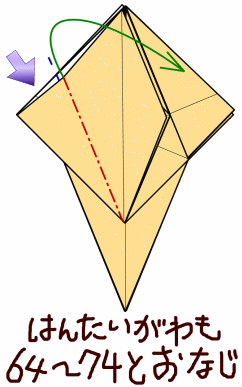
- 64
Open and squash.
- 65
- 66

Fold and unfold.
- 67
- 68
Open and squash.
- 69
In process.
- 70
Page 8 : processes 71 – 80
- 71
- 72
- 73
- 74
- 75
The other side is folded in the same way as processes 64 – 74, too.
- 76
- 77
- 78
- 79
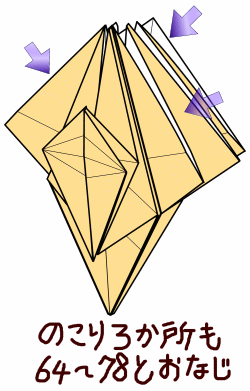
The other three places are folded in the same way as processes 64 – 78, too.
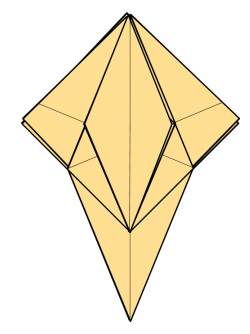
- 80
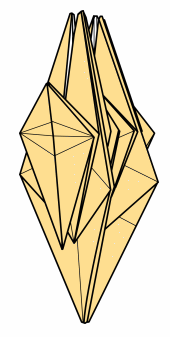
Page 9 : processes 81 – 90
- 81
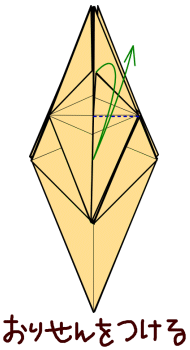
Fold and unfold.
- 82
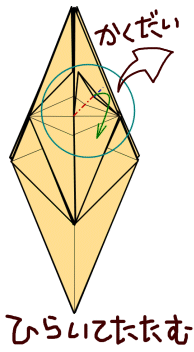
Open and squash.
- 83
In process.
- 84
- 85
Fold and unfold.
- 86
- 87
Open and squash as along folded lines.
- 88
In process.
- 89
- 90

Page 10 : processes 91 – 100
- 91
- 92
- 93
- 94

The other side is folded in the same way as processes 81 – 93, too.
- 95
- 96
The other three places are folded in the same way as process 81 – 95, too.
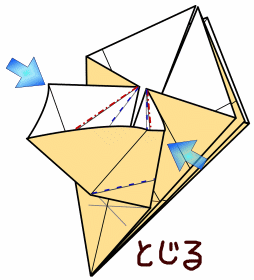
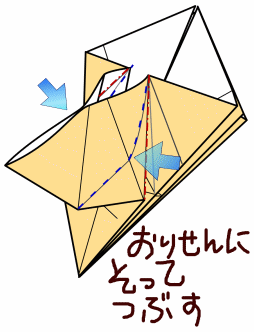
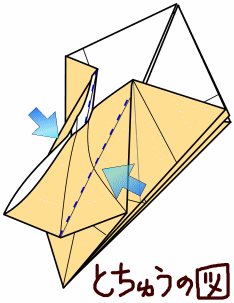
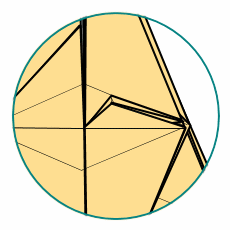
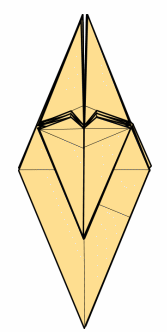
- 97
- 98
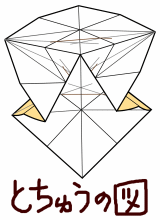
Turn each parts of the backside and the face. Notice ! Please watch a part which is turned carefully !!
- 99
In process.
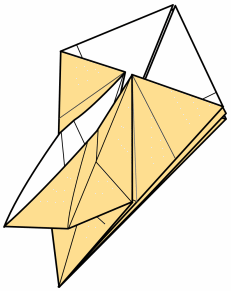
- 100
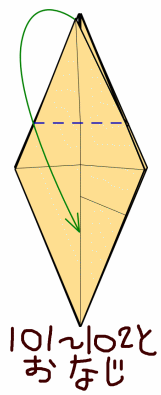
Page 11 : processes 101 – 110
- 101
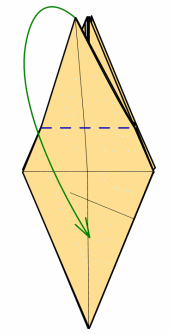
- 102
-
Turn it over
- 103
- 104
It is folded in the same way as processes 101 – 102, too.
- 105
- 106
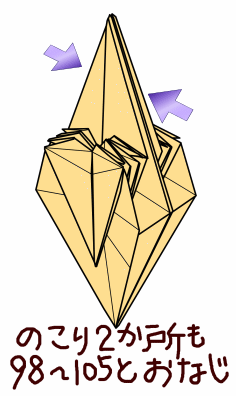
The remaining two places are folded in the same way as processes 98 – 105, too.
- 107
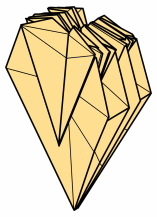
- 108
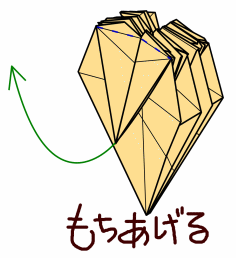
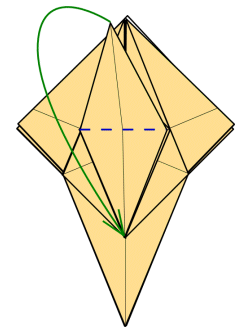
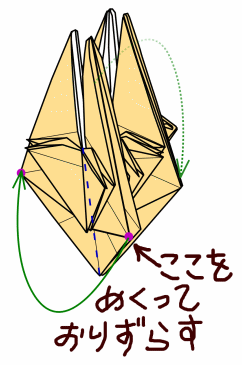
Pull it up.
-
Picture is enlarged
- 109
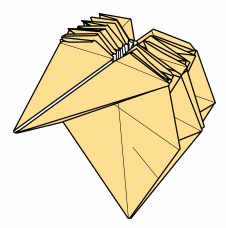
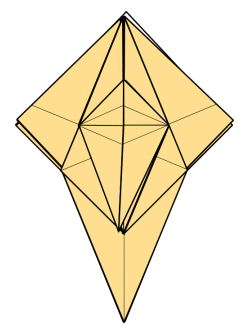
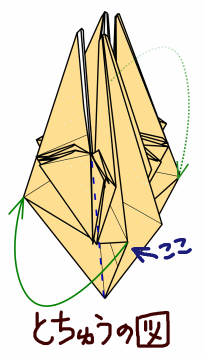
- 110
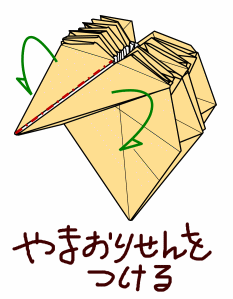
Make a line of the mountain and unfold.
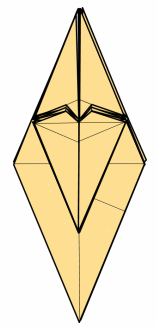
Page 12 : processes 111 – 120
- 111

- 112
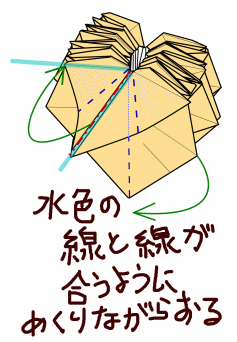
Turn and fold it so that each line color matches.
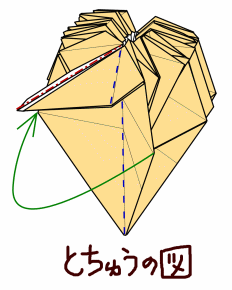
- 113

In process.
- 114
In process.
- 115
In process.
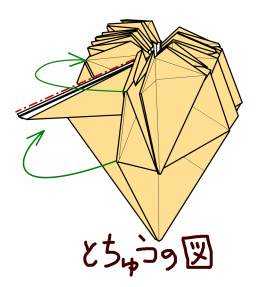
- 116
- 117
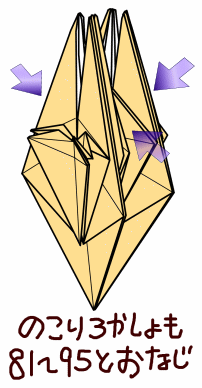
The other seven places are folded in the same way as processes 108 – 116, too.
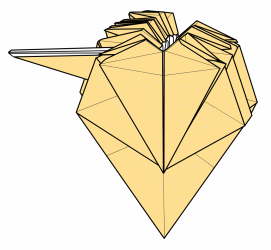
- 118
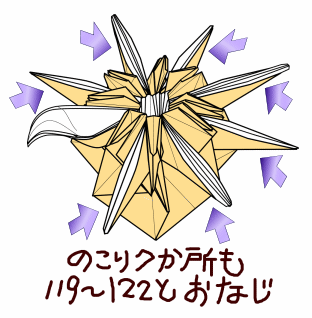
- 119
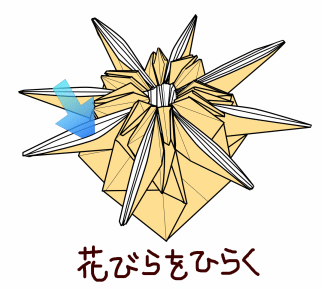
Open a petal roundly. There are a few places that can open in a petal, you can choose it.
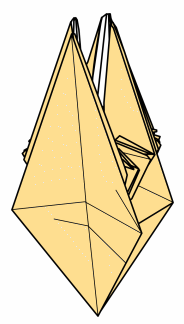
- 120
Page 13 : processes 121 – 124
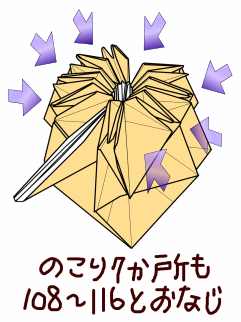
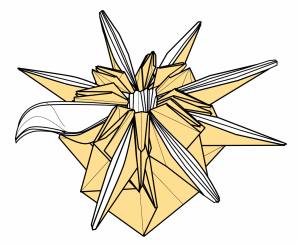
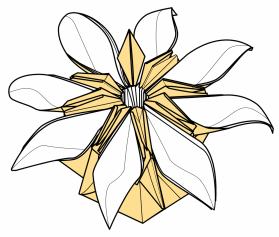
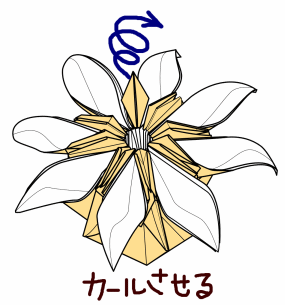
- 121
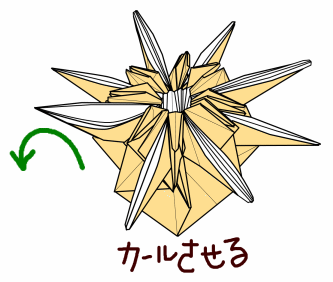
Curl it.
- 122
- 123
The other seven places are folded in the same way as process 119 – 122, too.
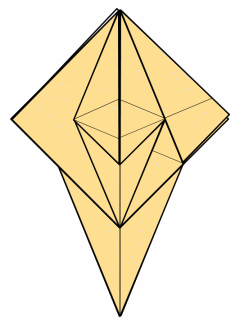
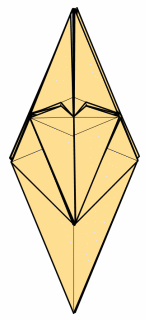
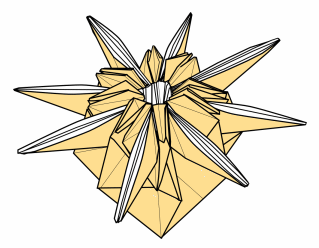
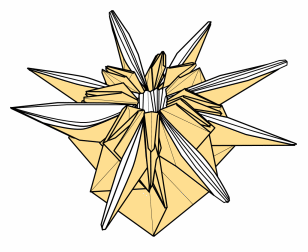
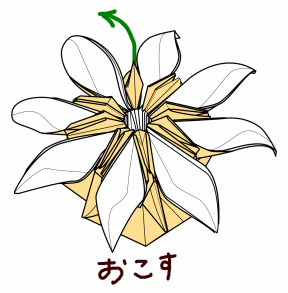
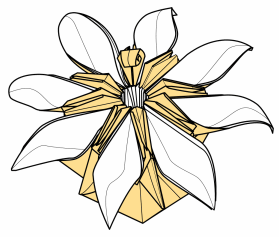
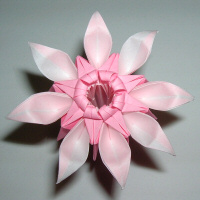
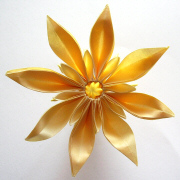
- 124
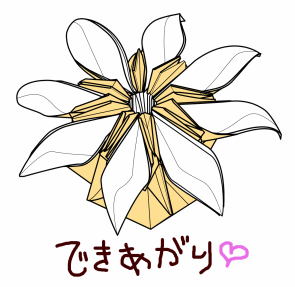
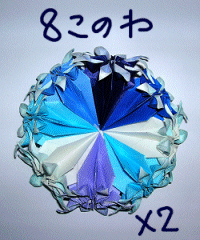
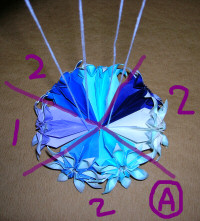
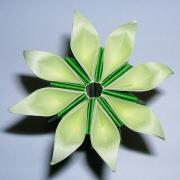
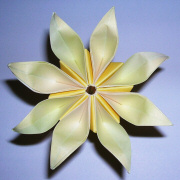
Finished !! (This is Type A)
タイプAのできあがり。タイプBもあります。 -
- Please curl it well to stabilize the form of the petal.
花びらをカールさせるのは、花びらの形を安定させるため。カールしないと、閉じてしまいます。しっかり、くるくるしよう。 - The numbers of necessary parts depend on each parts of swelling condition and binding threads. Please find numbers you think good.
パーツの数は、各パーツのコンディション(膨張具合)や糸のくくり加減によって前後します。適当に調節してね。 - There is Type B which is a varietion of marguerite. The next page.
タイプBもあります。このまま次のページへどうぞ。
Marguerite Type B / マーガレット タイプB
Page 14 : processes 125 – 130
- 125
Pull it up.
- 126
- 127
Curl it.
- 128
- 129
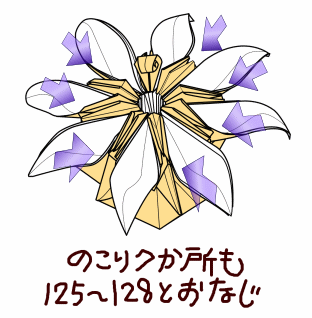
The other seven places are folded in the same way as proess 125 – 128, too.
- 130
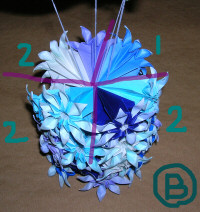
Finished ! It’s needed 30 – 32 parts. Way to get together is the same way as Type A.
タイプ B のできあがり ! 30 – 32個用意しよう ! まとめ方は A タイプも B タイプも同じです。
How to get parts together / パーツのまとめ方
Page 15 : processes 131 – 147
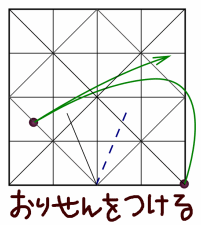
- 131
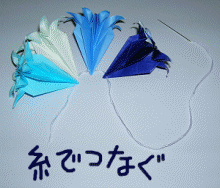
String parts with a needle and thread.
針と糸でパーツをつなげていきます。 - 132
1 unit needs seven parts.
7 つつなげます。 - 133
It’s needed 2 sets.
2 セット用意してください。 - 134
Also make a unit which is made with 8 parts. And It’s needed 2 sets.
8 つつなげたものも、ふたつ用意します。 - 135
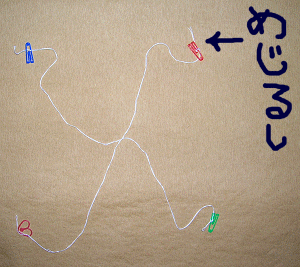
Prepare two strings, and tie at center. Then mark the each edges of string. As for this photo, there are no tassel and string to hung. If you need them, please set them in this process.
2 本の糸 (紐やテグスなどでもO.K!) を真ん中で結びんで十字に置き、糸の端に目印をつけます。吊るすための紐や飾り房を付ける場合は、この時に真ん中の結び目の所につなぎます。(写真ではどちらもつけていません) - 136
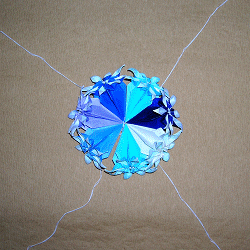
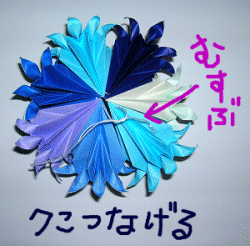
Put one unit which has 7 parts.
7 この輪のユニットを置きます。 - 137
It is the illustration the strings go through between parts.
ここから4段に重ねていきます。紐の通る場所の図解です。 - 138
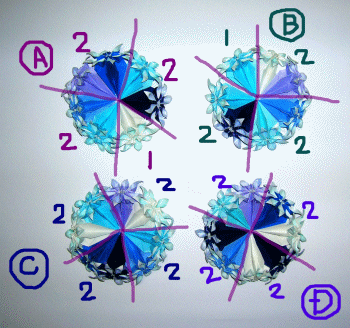
The first step.
1 段目。 - 139
The second step.
2 段目 - 140
The third step.
3 段目。 - 141
The fourth step.
4 段目。 - 142

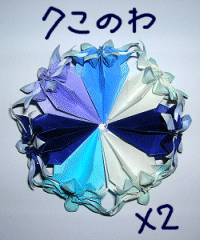
Gather parts to the center of the ball by fingers.
指で押して、パーツを中心によせます。 - 143
Tie the two strings.
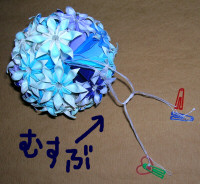
糸を 2 本ずつ持って、むすびます。 - 144
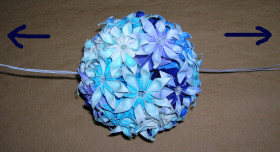
Pull them to the right side and left side. And tie up them at center of ball.
左右にぎゅーっと引っぱります。 - 145

Cut the strings. If you need them to hung or something, this process doesn’t need.
糸を切ります。飾るときの吊るす糸として残しておいても O.K です。 - 146
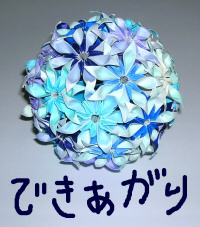
Finished !! Wooooo !!!
やったー!!! できあがりっ!!! - 147

Show it off, and boast !! You have to be proud !!
さんざん見せびらかして、自慢しよう!!
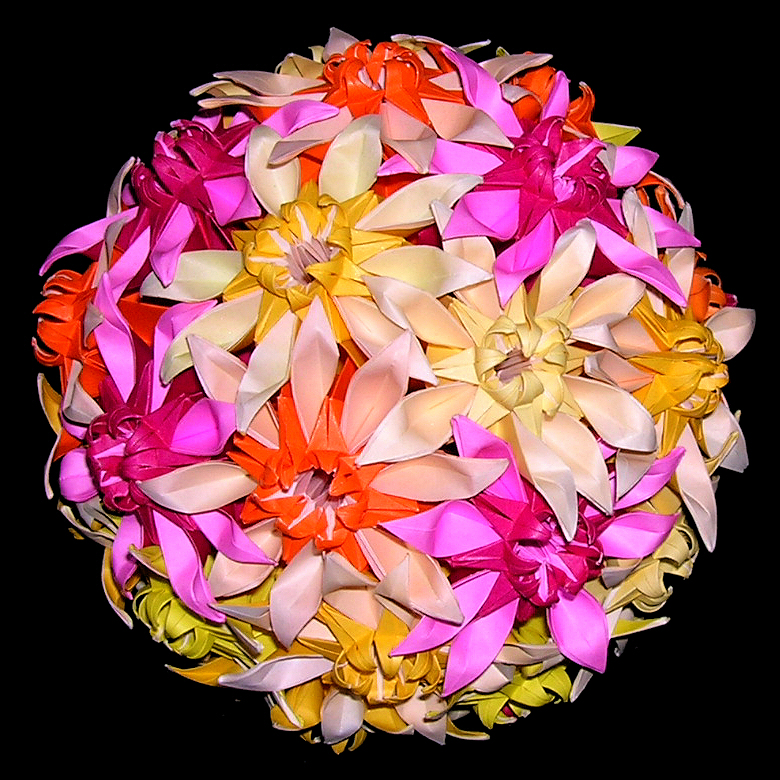
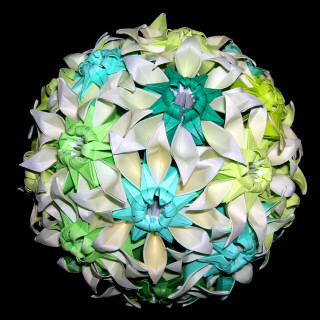
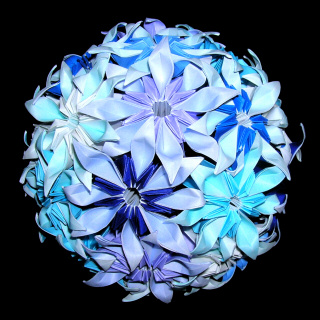
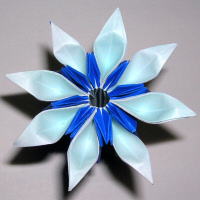
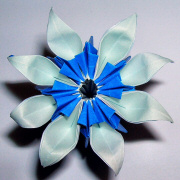
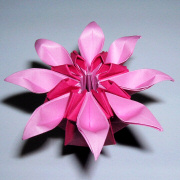
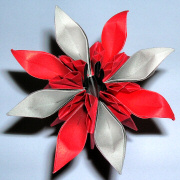
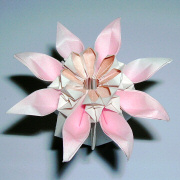
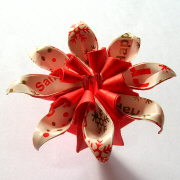
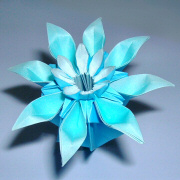
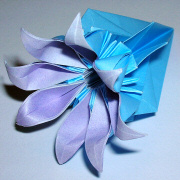
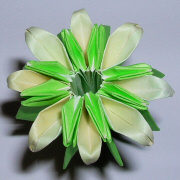
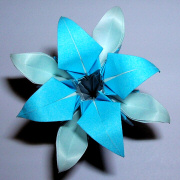
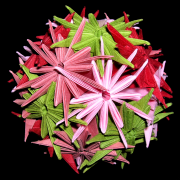
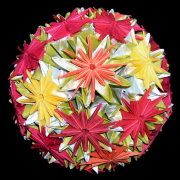
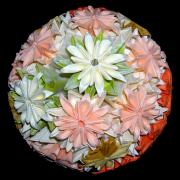
Variations gallery / バリエーションギャラリー
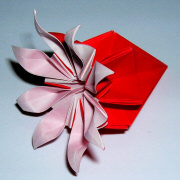
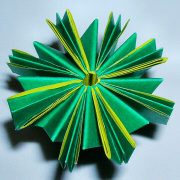
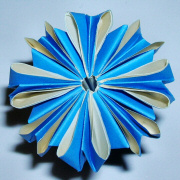
Marguerite 02
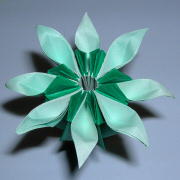
Marguerite 03
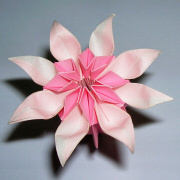
Marguerite 05
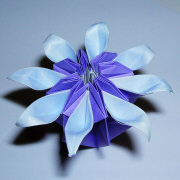
Marguerite 06
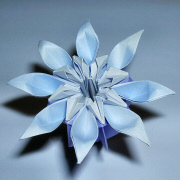
Marguerite 07
Marguerite 04
Marguerite 11
Marguerite 09
Marguerite 10
Marguerite 08
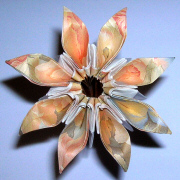
Marguerite 14
Marguerite 106
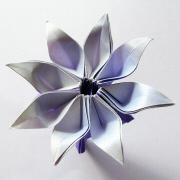
Marguerite 15
Marguerite 01
Marguerite 12
Marguerite 16
Marguerite 101
Marguerite 102
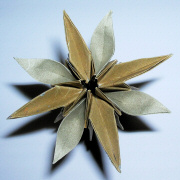
Marguerite 105
Marguerite 104
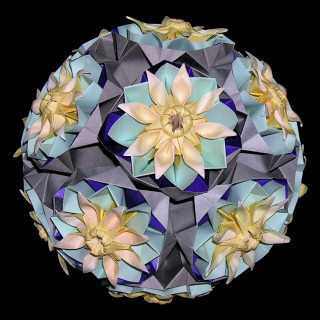
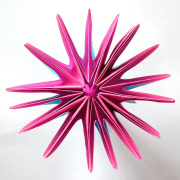
Development works / 発展作品
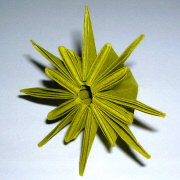
a part of Hidamari
a part of Hidamari / ひだまりのパーツ
-
Hidamari / ひだまり
Hidamari set in Star anise.
Opened petals
Hidamari 04
Hidamari 05
Hidamari 06
Hidamari 08
Hidamari 03
Hidamari 07

Hidamari 10
Hidamari 09
Hidamari C
この折り図は、2008年4月24日に開催された「折り図公開する?」のゲームによって公開されました。
Do you need the diagram of Marguerite? / 折り図、公開する?
Comments