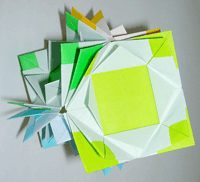
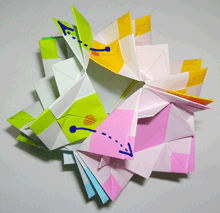
Variations

How to make the Kusudama of “Mosaic Box”? / くすだま 「モザイクボックス」の作り方
Work data
- Author
- Mio Tsugawa
- Creation date
- Apr.2003
- Drawing
- Apr.2003
- Parts
- 6 parts
- Paper size
- 7.5 cm (Square paper)
- Joining materials
- No use (No glued)
- Joining method
- Box-joint
Summary / 作品概要
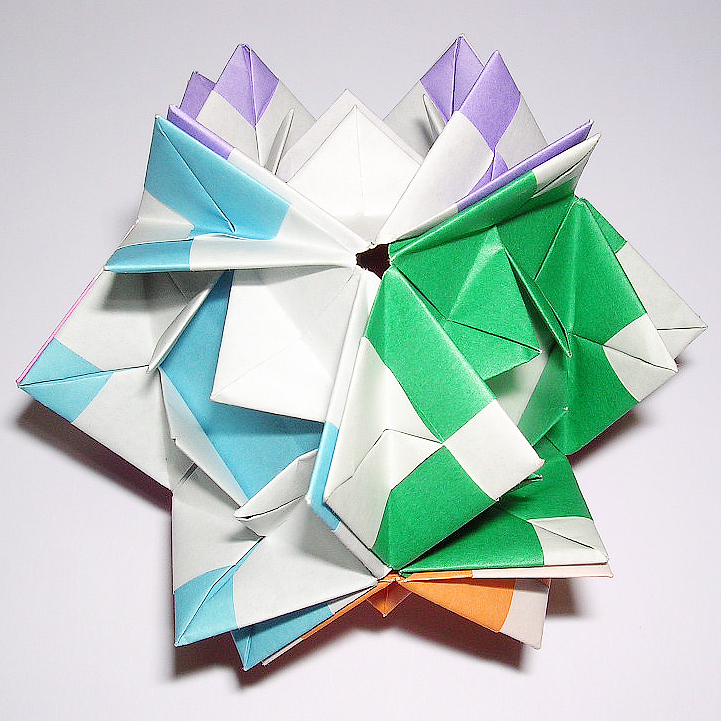
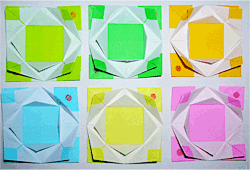
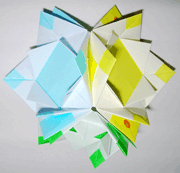
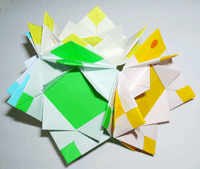
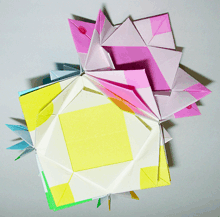
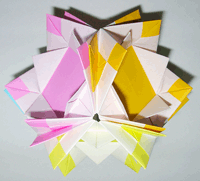
The work consists of only 6 parts without glue to assemble.
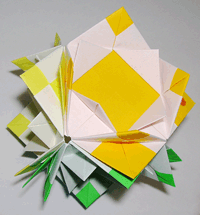
While you are folding this work with one side color origami paper, the pattern of it becomes like the pattern of mosaic steadily, which is beautiful and wondering.
You might be want to fold it more slowly with your attention, it would be fun.
The origami paper having 15cm square and more is recommended until you get used to folding the processes.

この作品を構成するのはたったの6パーツ。接着剤無しで組み立てます。折り紙を折りたたんでいるうちに、徐々に、美しく不思議なモザイクな模様になっていいきます。
折りたたみに慣れるまでは、大きめサイズの折り紙がオススメ!!
Get free the diagram of PDF file / 折り図 PDF 無料配布中
You can get the PDF file for free on here!!
The diagram of the PDF file includes one basic folding and two arrangement works.
パトロンさまにはPDFファイルを無料でダウンロードしていただけます。
PDFファイルの折り図には、ひとつの基本的な折り方とふたつのアレンジメントが掲載されています。
Preparations / 用意するもの
origami paper / 折り紙 : 6 sheets

A writing implement for making a mark.
How to fold / 折り方
Page 1 : processes 1 – 10
- 1
Fold and unfold
- 2
- 3
Fold and unfold
- 4

- 5
- 6
-

Turn it over
- 7
- 8
- 9

-
Turn it over
- 10

Page 2 : processes 11 – 20
- 11
- 12

-

picture is enlarged
-

-
Turn it over
- 13
- 14
- 15

-
Enlargement the image and Turn it over
- 16
- 17
- 18
The other three places are folded in the same way as this, too.
- 19
-
Enlargement the image and Turn it over
- 20
Page 3 : processes 21 – 29
- 21
Fold and unfold
- 22
The other three places are folded in the same way as this.
- 23
- 24
- 25

The other three places are folded in the same way as this.
- 26
- 27
Write the two marks on each parts of opposite.
- 28

Finished
- 29
It’s needed six parts.
6 パーツ用意しよう!!
Assembly / 組み立て方
- Assembly-1

There are the two flaps which have the marks you wrote.
フラップ (うで) は、印を付けたひらひらです - The backside

There are two pockets on backside. (It is not the place which you wrote the marks.)
ポケットは裏面に差し込み口があります。 - Assembly-2
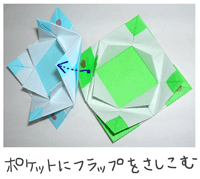
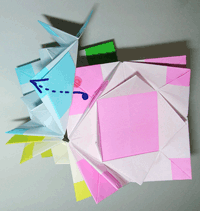
Insert a green flap which has the mark to a pocket of sky blue.
水色のポケットに緑色のフラップ (印のあるひらひら) を差し込みます。 - Assembly-3
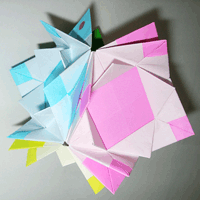
When inserted it, the mark is in the pocket, and can’t see it.
差し込むとフラップの印が見えなくなります。 - Assembly-4

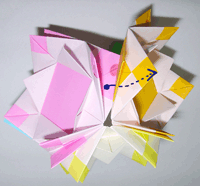
Add the third part and insert a sky blue flap to a yellow pocket.
水色のフラップを黄色のポケットに差し込みます。 - Assembly-5
Can’t see the mark of the flap.
水色のフラップの印は見えなくなります。次 (工程 6 ) は、黄色のフラップを緑色のポケットに差し込みます。 - Assembly-6
Insert a yellow flap to a green pocket.
フラップをポケットに差し込みます。 - Assembly-7
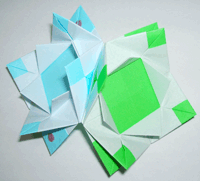
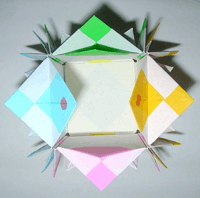
Can’t see the mark of the flap. The three parts are assembled.
3 つのパーツが組み立てられました。 - Assembly-8
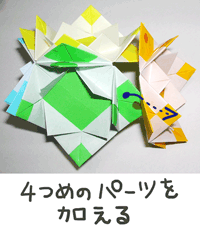
Add the fourth part and insert a green flap to a orange pocket.
緑色のフラップを橙色のポケットに差し込みます。 - Assembly-9
Can’t see the mark of the green flap.
緑色のフラップの印は見えなくなります。次は橙色のフラップを黄色のポケットに差し込みます。 - Assembly-10
Insert a orange flap to a yellow pocket.
フラップをポケットに差し込みます。 - Assembly-11
Can’t see the mark of the orange flap.
橙色のフラップの印は見えなくなります。次は黄色いパーツに新しいパーツを加えます。 - Assembly-12
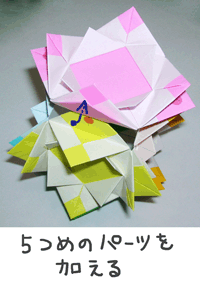
Add the fifth part and insert a yellow flap to a new rose pocket.
黄色のフラップを新しい桃色のパーツのポケットに差し込みます。 - Assembly-13
Can’t see the mark of the yellow flap.
黄色のフラップの印は見えなくなります。次 (工程 14 ) は桃色のフラップをお隣の水色のパーツに差し込みます。 - Assembly-14
Insert a rose flap to a sky blue pocket.
フラップをポケットに差し込みます。 - Assembly-15
Can’t see the mark of the rose flap.
桃色のフラップの印は見えなくなります。 - Assembly-16
Insert a rose flap to a orange pocket.
桃色のフラップを反対の橙色のポケットに差し込みます。 - Assembly-17
Can’t see the mark of the rose flap.
桃色のフラップの印は見えなくなります。 -
Turn it over
- Assembly-18
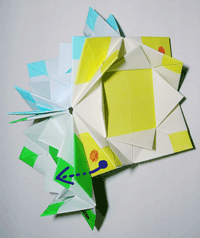
The two flaps and the two pockets are remaining each face to face.
ひっくり返すと、印のついたフラップが 2か所、ポケットが 2か所、それぞれ向かい合わせに残っています。 - Assembly-19
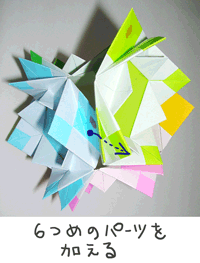
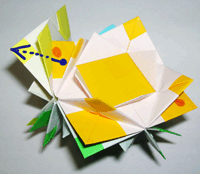
Add the last part and insert a sky blue flap to a new greenish-yellow pocket.
最後のパーツを加えます。水色のフラップをきみどり色のポケットに差し込みます。 - Assembly-20
Can’t see the mark of the sky blue flap.
水色のフラップの印は見えなくなります。 - Assembly-21

Insert a greenish-yellow flap to a green pocket.
お隣の緑のポケットにきみどり色のフラップを差し込みます。 - Assembly-22
Can’t see the mark of the greenish-yellow flap.
きみどり色のフラップの印は見えなくなります。 - Assembly-23
The remaining two flaps will be set at one time. Insert the orange flap to the greenish-yellow pocket, and insert the greenish-yellow flap to the rose pocket each other.
最後の 2か所は同時に差し込みます。 橙色のフラップをきみどり色のポケットに、きみどり色のフラップを桃色のポケットにそれぞれ差し込みます。 - Assembly-24
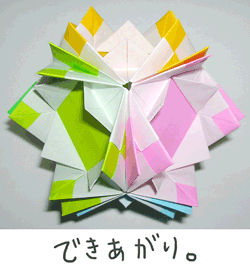
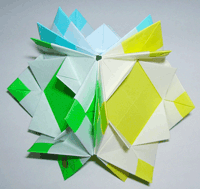
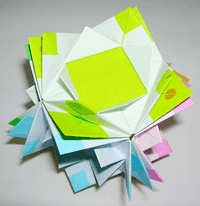
Finished.
If you can’t see any flaps having marks, the assembling was successful.
フラップの印が全部見えなくなっていたら、成功です。
Point / ポイント
- This assembling process is a little hard to understand, maybe.
There is one of the way that you trace a part of one color in each photos, and you may see easier.
組立図の写真は、いろいろと見る方向が変わるけど、ひとつの色のパーツを追っかけて見てみると、どんな感じに向きが変わったか、わかりやすいかも。 - It might be cuter setting bell in the work.
中に、鈴を入れてもかわいいね。


Comments